Somebody I know from work brought in a bag of freshly picked guava, a fruit which I had never seen, tasted or even heard of up until a month ago. Stupid me, I tasted them, but was too polite to say that I thought they were horrible, and the next thing I knew I was the proud owner of a HUGE bag of guava.
I went straight to Google to find out what to do with them and found a recipe for Guava Jelly.
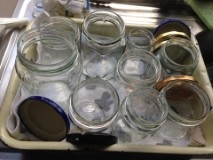
Mum came to the rescue with jars. I bought an enormous bag of sugar and Mum came to the rescue again with lemons, which are an essential for guava jelly making.
First of all, did you know there is a difference between ‘jam’ and ‘jelly’? I didn’t. All this time, I’ve been assuming jam is Australian and jelly is American, but this is not so. Jam uses the whole fruit, while jelly uses fruit juice only, resulting in a clear end product.
The quantities of ingredients you will need to make Guava Jelly vary according to how many guavas used, but I used three kilograms of sugar, and 12 tablespoons of lemon juice.
Guavas
water
sugar
lemon
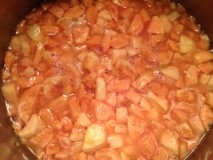
Peel and dice the guavas, (Mum helped again, thank goodness), and place them in a pot. Cover with water and bring to the boil, then simmer for about half an hour. The house will smell delicious but take it from me, they still taste horrible.
Cool the cooked guava, then strain through muslin into a large bowl overnight. I used an old pillowcase.
At this point, Mum and Dad chipped in again, telling me how their mothers used to strain fruit for jelly. According to Mum, Nana C used to hang the fruit over the back of a chair dripping into a bowl on the floor, while Dad told me that Nana J used a broom handle to hang the fruit from. At this stage, Dad told me that Nana J had always said making jelly was a lot of effort for not much result, making me wish I hadn’t started… but despite this, I tied the pillowcase to the laundry tap overnight to let the guava juice drip into a bowl. In the morning, I had to squeeze the fruit in the bag to release the remainder of the juice. I hadn’t quite finished when I remembered that I have a juicer in a box in the pantry which I could have plugged in, dumped the cooked guava into and got the same result with the push of a button. Stupid me.
Discard the pulp. Mum and Dad looked at the juice I had slaved over and said I would be lucky to get two jars of jam out of it. I threw the pillowcase away with the pulp, because cleaning it out seemed like too much hard work. Honestly, the only reason I continued was because I like to finish things.
Measure the guava juice and pour into a large pot. For every cup of juice, add four cups of sugar and four tablespoons of lemon juice to the pot. As I said earlier, I used nearly three kilograms of sugar and 12 tablespoons of lemon juice.
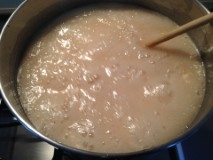
Stir the mixture over a low heat to dissolve the sugar, then bring to the boil. Bring the mixture back to a simmer and stir constantly. This mixture boils over really quickly, so don’t leave it for even a few seconds.
Once the mixture thickens, (I tested it on a saucer, under Mum’s expert eye), remove it from the heat and leave to cool for about half an hour. Skim the froth from the top, (I ate all of the froth and had a terrible sugar headache all day), then use a funnel to pour the jelly into sterilised jars.
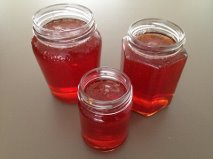
I ended up with 11 jars of Guava Jelly, which turned out to be absolutely delicious. Who would have thought? I have visions now of growing a guava tree and a lemon tree of my own and going into the Guava Jelly making business. I’ll keep a jar for myself and will be giving a jar of Guava Jelly to the kind fellow from work who gave me the guavas, Mum and Dad have taken a jar or two and I’ll be giving the rest away.
My only other advice is, store the jelly in the pantry, as it goes too hard to spread when stored in the fridge.
